Materials Acceptance
Sections
MATERIALS
Generating Materials and Acceptance Actions
To begin working with materials on a contract, you must first run process to generate the materials and acceptance actions for your contract. The process will consult the statewide reference material sets for each item and copy them to your contract.
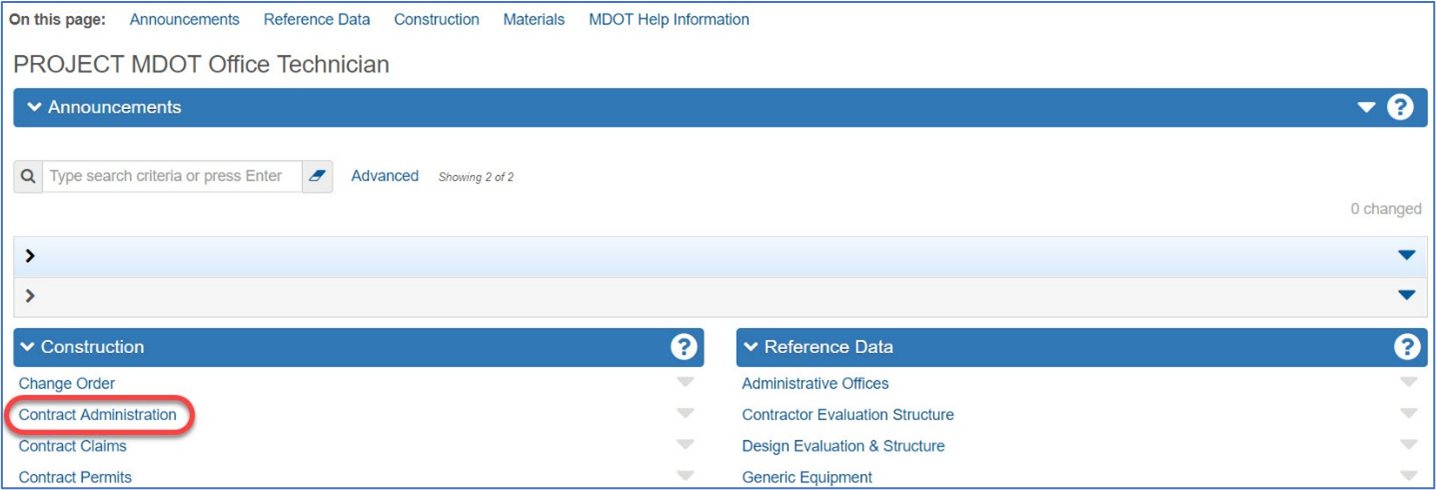
1. From the Home screen, Select the Contract Administration Overview component.
2. Select the row Action (solid blue triangle on right side of screen) for the corresponding contract.
3. Select the Generate Materials and Acceptance Actions task.
4. A “Processing…” message will appear at the top of the screen and the system will refresh the page when the task has been completed.
| NOTE |
|---|
| You should only need to run this process once when you first start working on your contract. If you see Update Materials and Acceptance Actions rather than Generate Materials and Acceptance Actions in the drop down menu, the process has already been completed. |
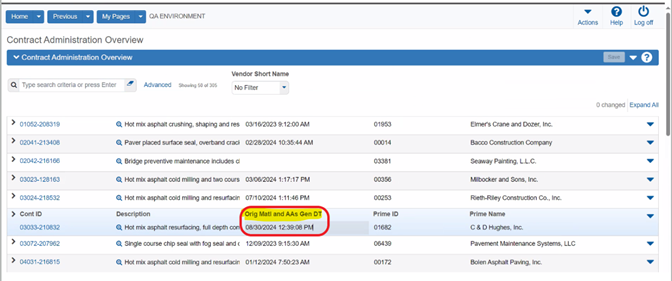
5. The following fields will auto-populate:
- Orig Matl and AAs Gen DT: This field displays the date and time the Generate Materials and Acceptance Actions process was completed.
Creating a New Material Set
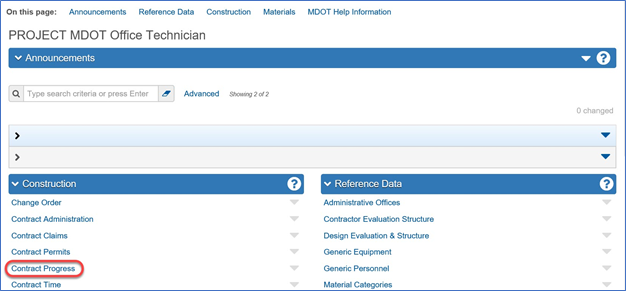
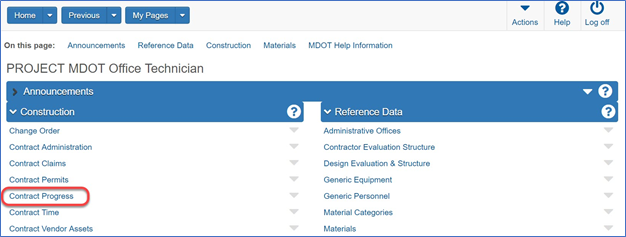
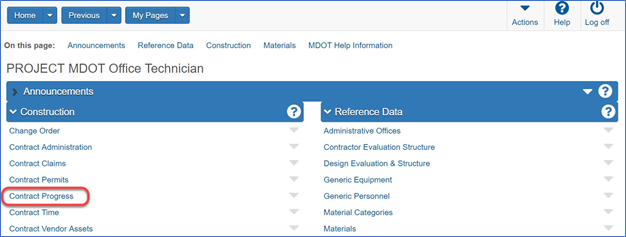
1. From the Home screen, Select the Contract Progress Overview component.
2. Select the corresponding contract.
3. Select the Items quick link at the top of the page.
4. Select the Contract Project Items tab.
5. Select the Category and Item to add the set to. Select the Create Material Set from the Actions dropdown.
6. Enter a name for the material set in the Material Set field and tab out of the field.
| NOTE |
|---|
| Once a material set is created it cannot be deleted. |
7. Click the Save button.
8. The system now navigates you to the material screen where the material set has been created.
9. See Step 6. in Adding Materials to Material Sets section to complete the setup.
Adding Materials to Material Sets
1. From the Home screen, Select the Contract Progress Overview component.
2. Select the corresponding contract.
3. Select the Contract Materials and Acceptance Actions quick link at the top of the page.
4. Select the Materials tab.
| NOTE |
|---|
| Materials can be added to sets, even ones that came from the reference data, but they cannot be deleted. |
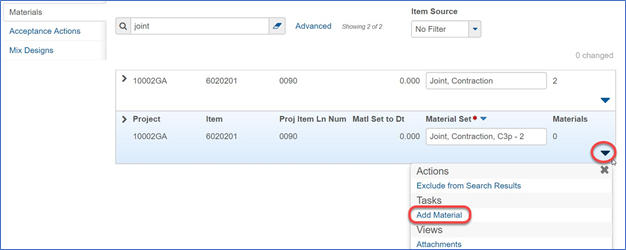
5. Select the row Action for the material set you wish to add materials to.
6. Select Add Material.
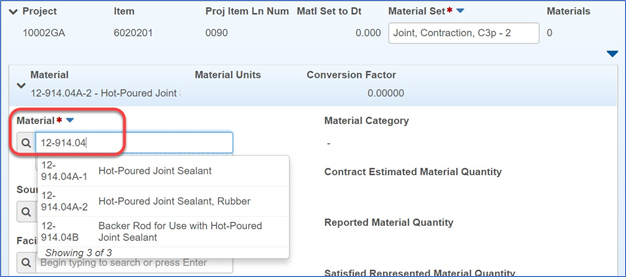
7. The following fields must be completed:
- 'Material: The name of the material that is part of this material set.
8. The following fields are optional:
- Source: The name of the material that is part of this material set.
- Facility: The name of a facility associated with the source.
- Comments: Any material comments you want to add to this screen.
| NOTE |
|---|
| Multiple materials can be added at the same time by repeating steps 5 through 8 before clicking the save button. |
9. Click the Save button.
Changing Acceptance Actions
1. From the Home screen, Select the Contract Progress Overview component.
2. Select the corresponding contract.
3. Select the Contract Materials and Acceptance Actions quick link at the top of the page.
4. Select the Acceptance Actions tab. Search for the material in the search field.
5. Expand the row for the material you wish to change.
6. Select the Acceptance Action listed in the blue text.
| NOTE |
|---|
| Using two monitors helps keep your place in the list. In step 6, use a right click on the acceptance action to open it in a new window. |
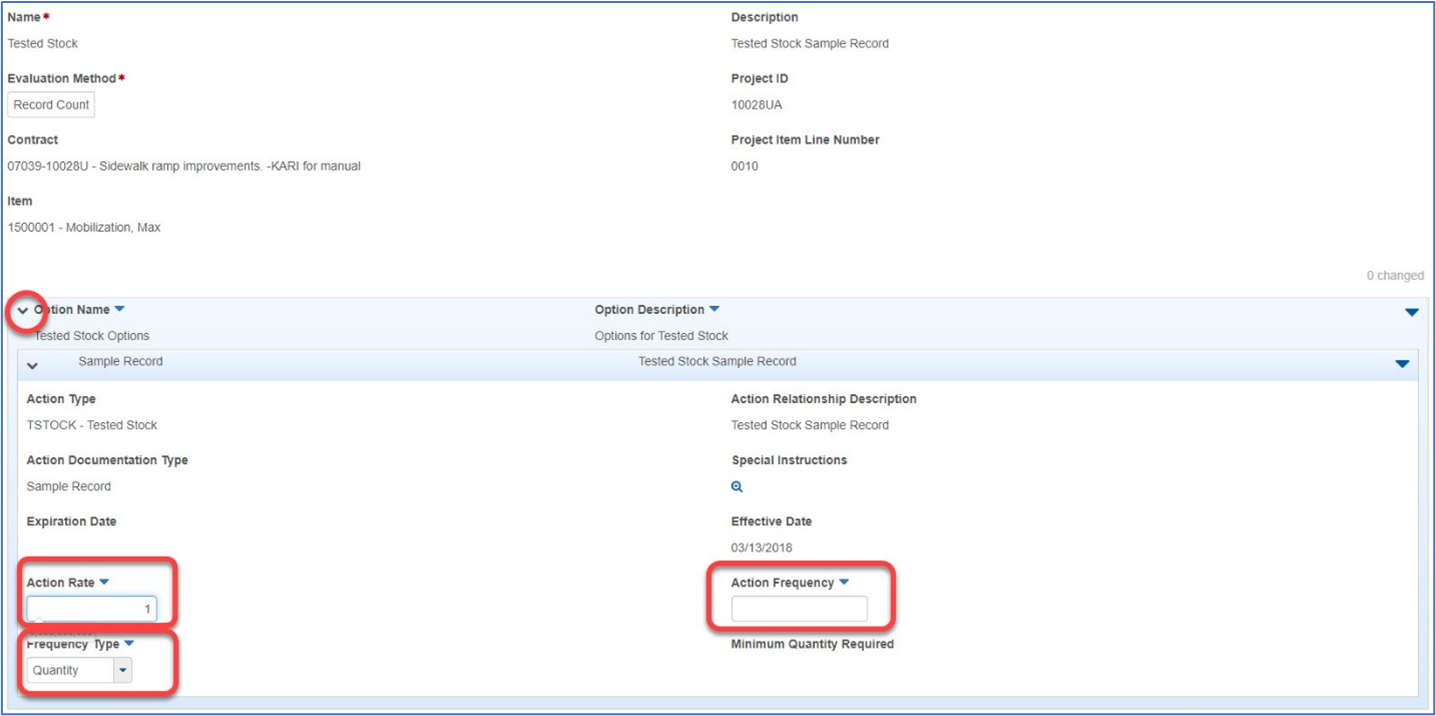
7. Expand the Acceptance Action Option at the bottom of the screen.
8. The following fields are required:
- Action Rate: The number of sample records required based on the action frequency.
- Action Frequency: The frequency of which the number of sample records is required to occur.
- Frequency Type: The unit for the action frequency.
9. Click the Save button.
Creating a New Material
Due to business policies and procedures, the field offices are restricted from creating new materials for the system. If for some reason a material is needed for a project and does not exist in the system, please contact the helpdesk at MDOT-ConstructionSoftware@michigan.gov. Please be prepared to give information regarding the material name and the specification from which the material comes from.
Entering Material Approvals (Sample Records)
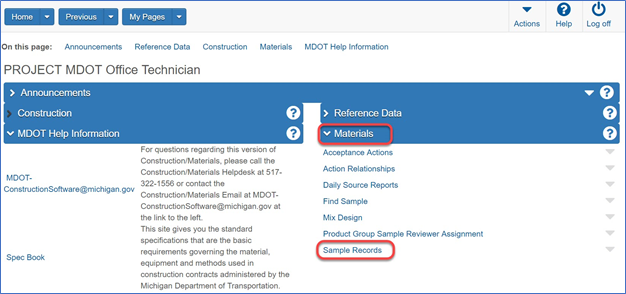
1. From the Home screen, select the Sample Records component.
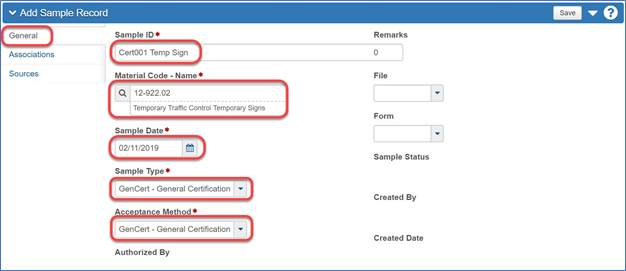
2. Click the component Action menu and select Add.
The following fields are required:
- Sample ID: The identification name of the material approval to be entered.
- Material Code - Name: The material that is being approved.
- Sample Date: The date of approval.
- Sample Type: The sampling method of the material.
- Acceptance Method: The acceptance method of the material.
| NOTE |
|---|
| Sample Records can be started, then finished later. The material will only be approved once you complete the Tests tab in step 21. |
3. The following fields are optional:
- File: The project file location.
- Form: The form number for the approval.
- Remarks: Any material comments that may need to be recorded.
4. Click Save.
5. Select the Associations tab.
6. Click the New button.
7. For the Association Type field select Destination Lab.
8. For the Association Value field press enter and select CTLAB.
9. Click Save.
10. Click the Sources tab.
11. Click the Select Primary Source button.
12. Search for the Source of the material and click the Add to Sample Record button.
13. Click Save.
14. Select the Contract tab.
15. Click the Select Contract Project Items button.
16. Search for and select the Project Items that the material approval applies to.
17. Click Save.
18. Select the Tests tab.
19. Select the row Actions menu and select Assign Default Tests.
20. Select Pass in the Test Result Value field.
| NOTE |
|---|
| If no test appears when you complete Step 20, check the Sample Type and Acceptance Method on the General Tab. These must match how the material was set up. |
21. Click Save.
Viewing Material Approvals (Sample Records)
1. From the Home screen, select the Sample Records component.
2. Use the Search field to find and select the sample record.
3. Review the sample record information.
Copying Material Approvals (Sample Records)
1. From the Sample Record Overview Screen or from within the sample record itself, use record row or component Action Menu and select the action Copy.
2. Navigate through the wizard’s pages via the Blue Arrows. The wizard has the following pages:
- Lab Control Number – This should be left defaulted to “Coopy Lab Control Number”
- Enter New Sample Info – Enter the new sample record ID name and date.
- Select Data To Copy – Select which data you would like to copy over from the old sample record. Note that the Tests and Test Results are unchecked by default.
- Select Sample Record Tests – If you selected the option to copy tests over, select the tests you wish to copy.
- Select Test Results - If you selected the option to copy test results over, select the test results you wish to copy.
- Confirm – Review your selections and click the Confirm button.
3. The page will refresh and you are presented with your new Sample Record.
Creating The Insufficient Materials Report
1. From the Home screen, select the Payment Estimates component.
2. Use the Search field to find the corresponding payment estimate.
3. Click the row Action and select the Insufficient Materials Report.
4. Select the Execute button.
